Accessing Title Wrapper Templates
You can access your title wrapper templates from the Liquid Templates > Title Wrapper page. If you don’t have one, you can create a new one from the Add New Post button.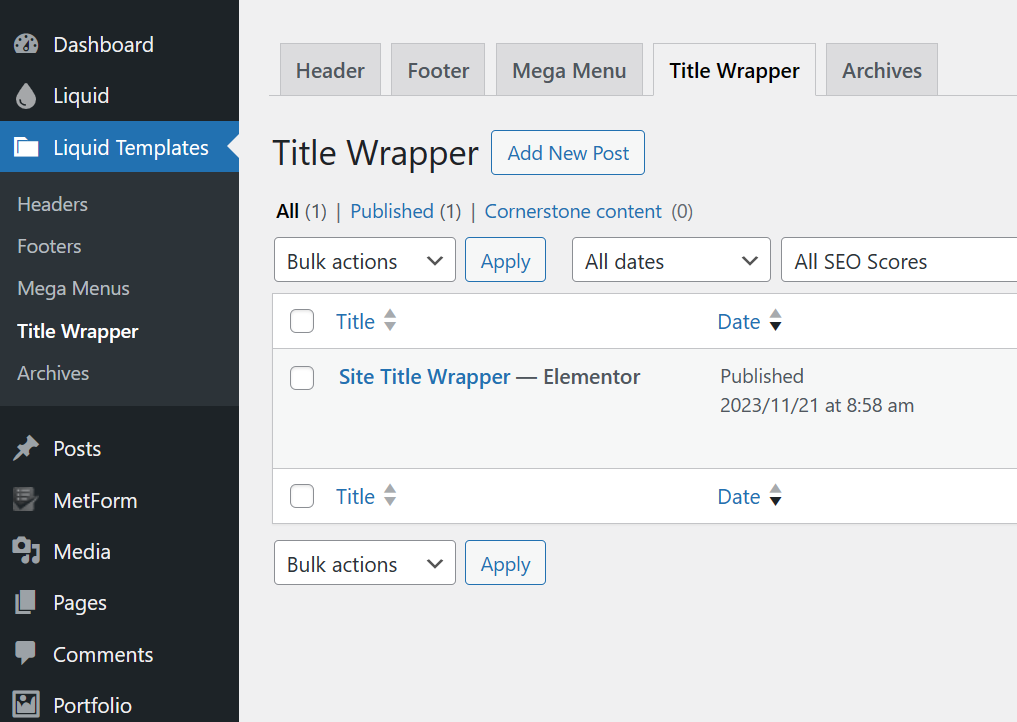
When creating a new title wrapper, you can import a pre-built title wrapper template from LogisticsHub Collections. Read more details
Changing Title Wrapper Content on a Page-by-Page Basis
First of all, you need to add the necessary shortcodes to your title wrapper template so that the title wrapper content can change on a page basis.
- Open your title wrapper template with Elementor.
- Add the relevant shortcodes to your template.
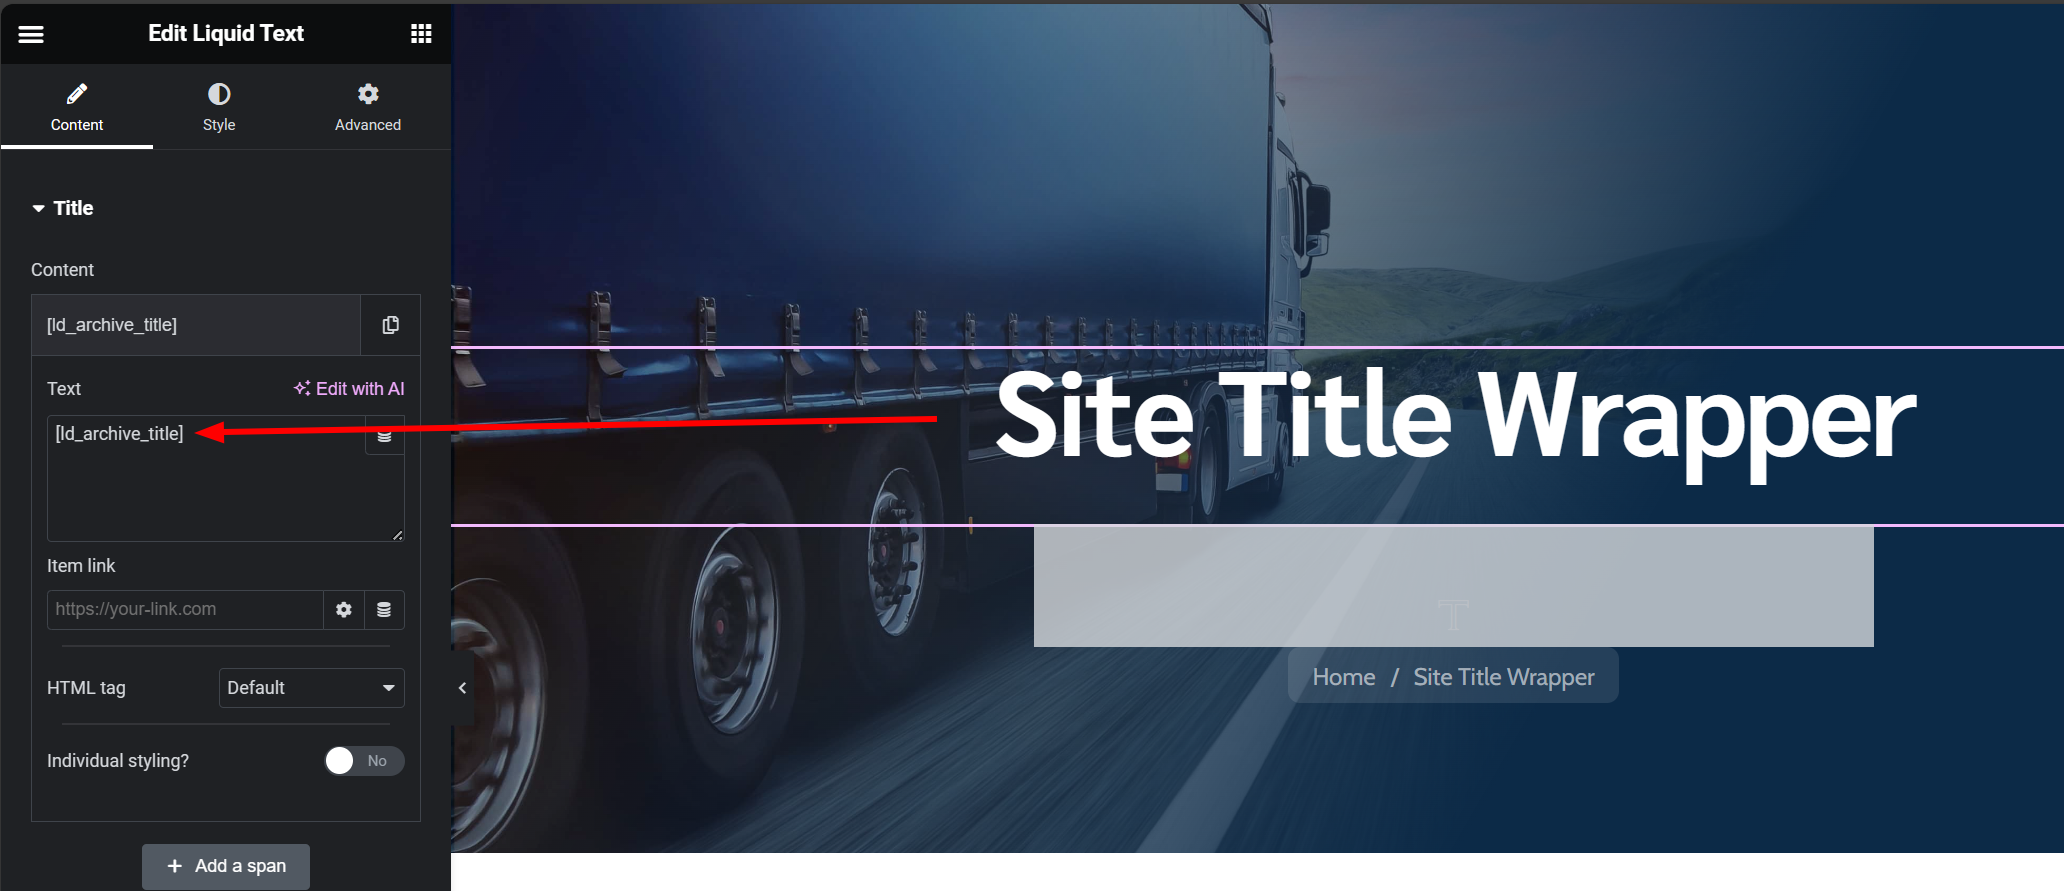
- For the title;
Add a Liquid Text widget to your title wrapper template and add the [ld_archive_title] shortcode to its content.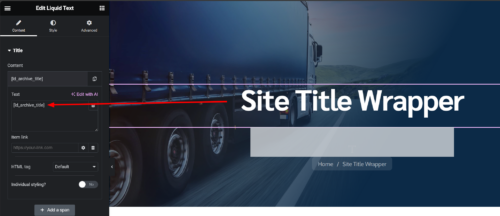
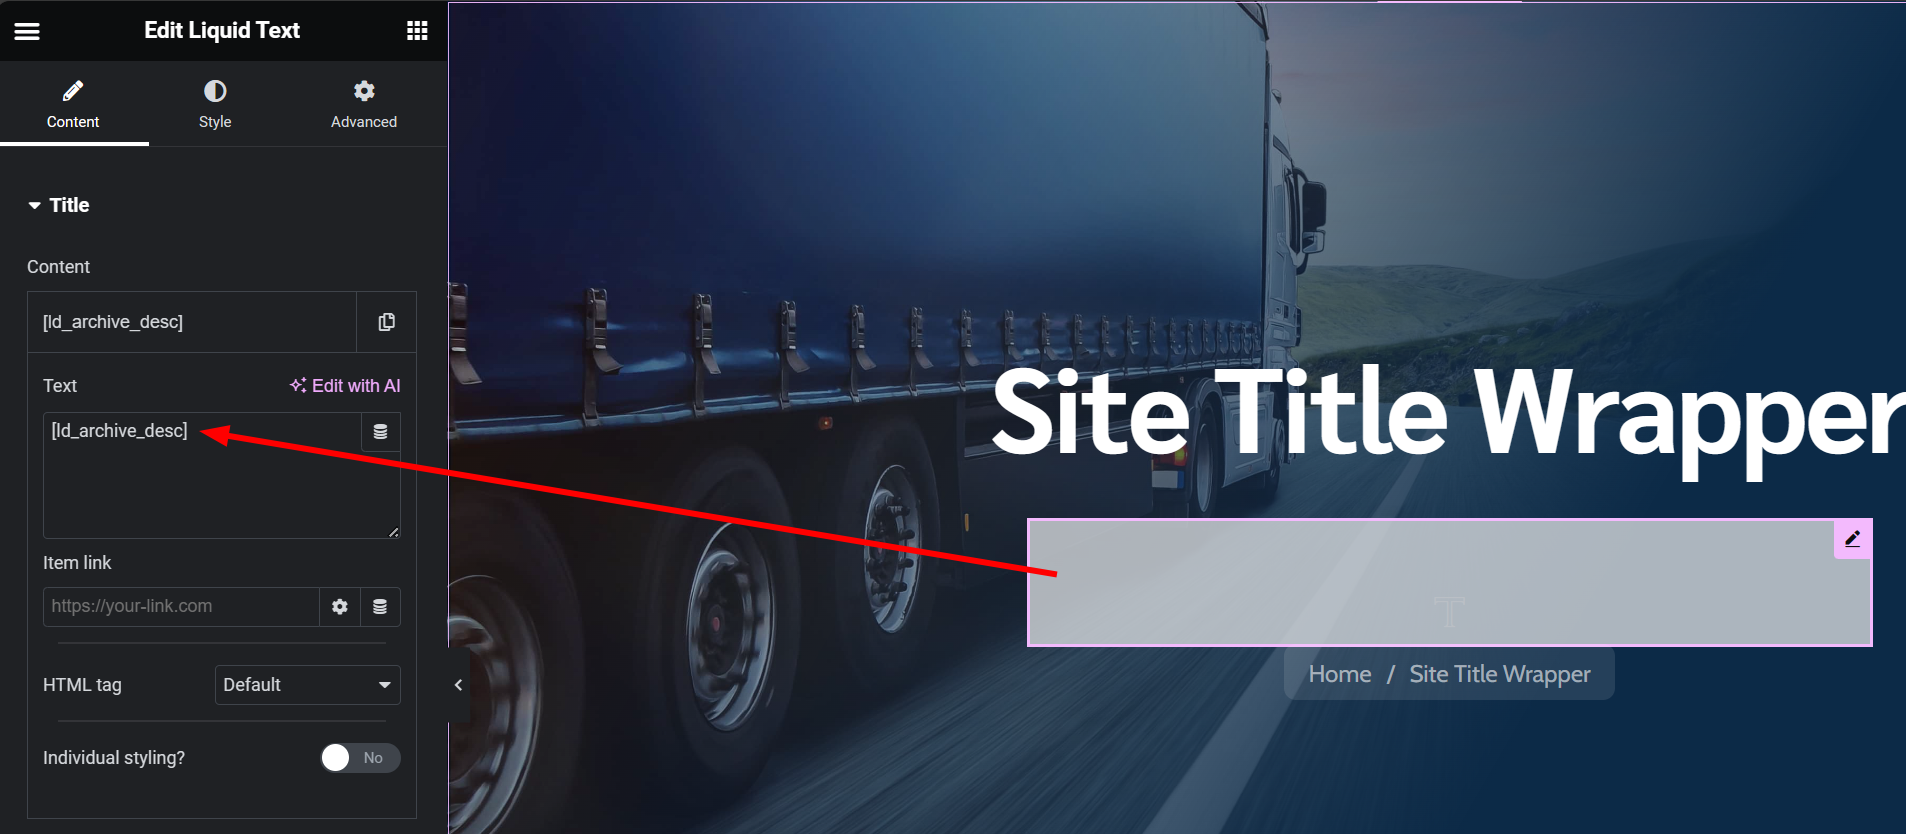
- For the subtitle;
Add a Liquid Text widget to your title wrapper template and add the [ld_archive_desc] shortcode to its content.
- For the title;
- That is all! Now let’s change the title wrapper content from a page.
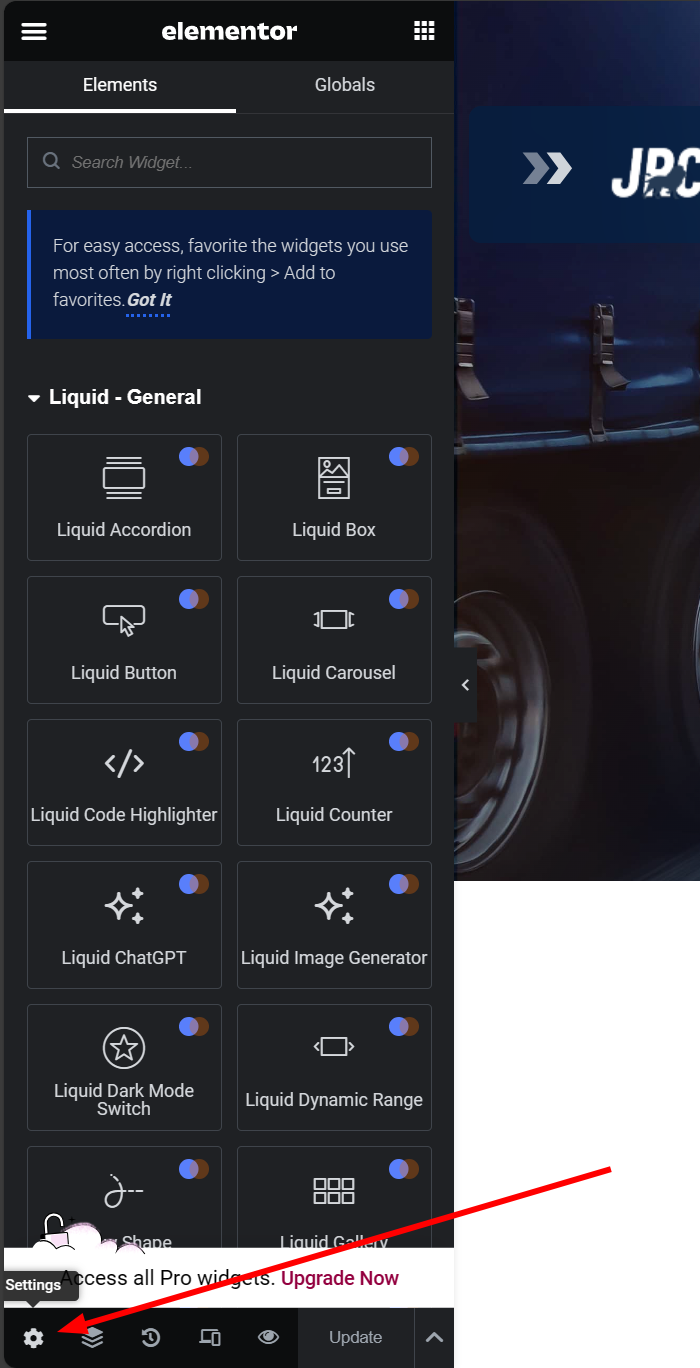
- Open your page with Elementor and click on the settings icon.
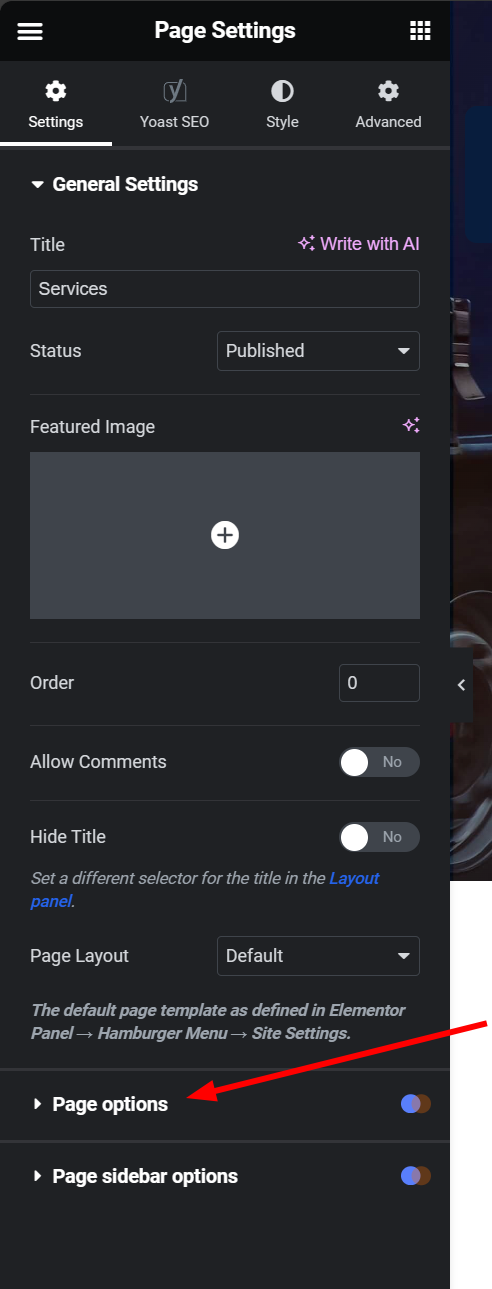
- Click on the page options tab.

- There you will see title wrapper options.

– Title Wrapper Custom Title: Enter here the text that will be displayed as the title text of your title wrapper.
Note: If you leave it blank, the name of the page will be shown by default.
– Title Wrapper Custom Description: Enter here the text that will be displayed as the subtitle text of your title wrapper.
– You can also change the background of your title wrapper using the options here. - After making the relevant changes, save it and when you check your page, you will see that the title and subtitle have changed.